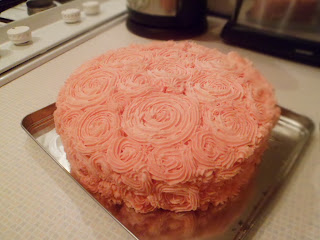
I got the sponge recipe from one of my recipe books I got for Christmas- Home Bake by Eric Lanlard. I haven't had a chance to try out a lot of his recipes but I was very impressed by the way this cake turned out!
For the sponge:
175g (6oz) Unsalted Butter, at room temperature, plus extra for greasing. (I used Stork Margarine)
175g (6oz) Caster Sugar
1½ tsp Vanilla Extract ( I use Sainsbury's Taste The Difference Madagascan Extract)
3 Eggs, at room temperature.
175g (6oz) Self-Raising Flour, Sifted
1 tsp Baking Powder, Sifted
Preheat the oven to 180oC (fan 160oC/350oF/Gas Mark 4). Grease two 7inch sandwhich tins and base-line with baking paper. (Click here to see how)
Cream the butter/margarine and sugar together in a large bowl until light and fluffy. Use an electric whisk for best results. Add the vanilla extract and gradually beat in one egg with a tablespoon of flour, until creamy and well-combined. Continue with the two other eggs. Gently fold in the remaining sifted flour and the baking powder, using a large metal spoon.
Divide the mixture between the two tins and smooth the tops. Bake for 18-20 minutes, until they are well risen and spring back when lightly pressed. Leave to cool in tins for 5 minutes, then turn out onto a wire cooling rack. Leave to cool completely before icing.
For the Icing:
200g (8oz) Unsalted Butter (Again, I used Stork)
405g (14oz) Icing Sugar, Sifted
1½ tsp of Vanilla Extract
Place the butter into a mixing bowl and beat until creamy. For best results use an electric whisk. Add a third of the icing sugar and beat well. Continue this method until all the icing sugar is used. When it is all added, it should be light and creamy. Finally, add the vanilla extract.
Take some icing and cover the whole cake in a light layer of icing using a spatula or pallet knife. This is to seal any crumbs and to make sure no cake can be seen once the roses have been added.
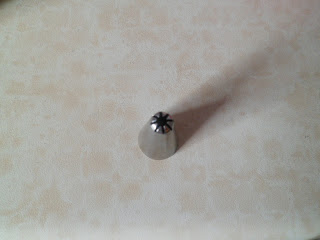
My first icing bag was a Tala one that came with 6 nozzles. To get the rose effect, I used a Tala No. 30 star nozzle but I think any star nozzle with create the look of a rose. Obviously, a bigger star will create the look of bigger petals and smaller one will create tight roses. Personally, I prefer the bigger look.
Fill your icing bag two thirds full and have a firm grip on the bag. To pipe a rose, start in the middle of where you want your rose to be and pipe OUT to create a spiral. You can make the roses as big or as small as you like and I think a mixture of sizes look good. I found it was good to practise a couple on a wipe able surface or baking paper.
A variation of this cake is to used Cream Cheese Icing as it makes the roses look "fluffier".
Happy Baking!
x
Please leave a comment below!
Follow @NicckkNackk


 />
/>
No comments:
Post a Comment