About Me

My photo
Welcome to my blog- A place of food, cakes and bakes! Just a fun-loving student who loves to bake!

Thursday 26 July 2012

Saucy Lemon Puddings


The sun has got his hat on! Hip hip hip hooray! Finally, some well-deserved sun! Having broken up from school for 6 weeks now (lucky, I know) it was great to start off the holidays with such lovely weather. 
Now, I am someone who defiantly has a sweet tooth and I love my puddings. But in this heat, you don't often want a heavy, stodgy dessert to make you feel bloated. This pudding is perfect for that sweet summery satisfaction but without the guilty feeling after. It has a gorgeous saucy base with a light sponge topping so it feels satisfying and refreshing. 


For 4 puddings, You will need:

50g (2oz) Butter/Margarine
125g (4oz) Caster Sugar
Zest and Juice of 2 lemons 
2 Eggs, separated
40g (1½oz) Self Raising Flour, Sifted
300ml Milk
1 tbsp Icing Sugar


Preheat the oven to 180oC/160oC Fan/Gas Mark 4. Grease 4x200ml oven-proof dishes. 


Put butter, caster sugar and lemon zest in a bowl and cream together until light and fluffy. Gradually whisk in the egg yolks and then fold in the flour. Stir in the milk and lemon juice.
In a separate clean bowl, whisk the egg whites until they are softly peaking. Gently fold them into the mixture. 


Spoon the mixture into the greased dishes and stand them in a roasting tin. Fill the roasting tin with boiling water until it reaches half way up the sides. Bake for 25 minutes until the top is golden. Dust with icing sugar to serve. 


An alternate option is to use 1 lemon and 1 lime to give it a different citrus flavour! 


Happy Baking! 
x

Please leave a comment below! 
Follow @NicckkNackk


Saturday 21 July 2012

Delicious Mediterranean Chicken Tray Bake

My mum's got quite a few handy friends when it comes to cookery and one of them recycles all her cookery magazines by giving them to me- A lovely gesture, and it's eco-friendly! Pouring over them is a great way to find new recipes and tips and this was one that I found in BBC's Good Food Magazine. I would really recommend it! It's full of good ideas and new things to try and well as the old family favourites. The more confident chef might find the recipes a bit tedious, but they're just right for me! 
It was simple to make and turns out to be a really tasty mid-week meal. The garlic cheese really compliments the roasted vegetables and the simple rice contrasts from the bold flavours of the other ingredients. I think the colours also look amazing, as there's nothing worse than a dull-looking meal; it makes it look so unappetizing. 


To Serve 4:
2 Red Peppers
1 Red Onion
4 Chicken Breasts (Optional to remove the skin)
150g pack of Garlic and Herb Soft Cheese (You can also use a garlic cheese like Boursin)
Cherry Tomatoes
Handful of Black Olives
Olive Oil

Preheat the oven to 200C/180C fan/ Gas Mark 6. De seed the peppers and cut into chunks. Cut the onion in wedges and mix together with the pepper in a baking tray. Drizzle with oil. Cook for 10 minutes. 

Cut a horizontal slit into the chicken breasts and push equal amounts of the cheese into them. Smooth the slit and brush with oil. Add them to the tray along with the tomatoes and olives and season. Return to the oven and cook for a further 25-30 minutes, until the chicken is fully cooked.

Serve with rice white. I won't include quantities as I don't actually weight out rice. But I usually cook it for short bursts in the microwave on a lower heat setting. 

This meal would also go lovely on couscous and you could add some green vegetables, for instance mange taut, to add even more colour! 

Happy Baking! 
x

Please leave a comment below! 
Follow @NicckkNackk


The picture above is from BBC's Good Food Website as mine didn't turn out very well!


Saturday 14 July 2012

Pretty Pink Rose Wedding Cake

It's become a tradition at my school, that when you reach Year 10, the whole year puts on a mock wedding.  Now, whenever I mention this to someone, I always get the same reaction. The puzzled look. Why would a school hold a mock wedding? It's strange I know. And I'm not totally sure why we do it. We are a Church of England school and part of our R.E (religious education) GCSE is to do with Christian Weddings and Divorce. It's also ran by the students who took long course R.E (meaning the get a full GCSE in it, as opposed to half). So they organise it and have first pick of the roles. Yes, there's the bride, the groom, ushers, bridesmaid, the whole shoobang really. One of my good friends, Clare, was picked to be the bride and she looked amazing!    
  

Most of my friends ad become involved. One was the photographer, another the hair stylist, one in the band and then two in the bridal party. So I offered to make the wedding cake along with two other friends. Originally I hadn't realised what a big task it was. And our R.E teacher assured me it had been done well in the past so we had to impress. The first mammoth task was to find a recipe and the correct cake tins. It was harder than you think. But with help from teachers and my mums friends we got a 12 inch, a 10 inch, an 8 inch and a 6 inch. The next part was the fun part; Designing the cake! And we weren't short of ideas.


We decided to match the colour scheme of pink and go for sponge as fruit cake was expensive and we were on a budget! We used butter icing for the two chocolate layers and royal icing for the 2 vanilla layers.

For the 12 inch Chocolate layer:

340g (12oz) Margarine, at room temperature
340g (12oz) Caster Sugar
6 eggs
170g (6oz) Self Raising Flour, sifted
70g Cocoa Powder, sifted
3 tsp Baking Powder, sifted
1 tsp Vanilla Extract

Preheat the oven to 180oC/356oF/ Gas Mark 4. Grease and line the cake tin with greaseproof paper or baking parchment. 


Cream the margarine and caster sugar together in a bowl until light and fluffy.

 Add 2 eggs wit ha heaped tablespoon of the flour. Beat well. For best results use an electric hand whisk. Repeat for all 6 eggs. 
Fold in the remaining flour, the baking powder, the cocoa powder and the vanilla extract using a large metal spoon. When all the ingredients are combined, pour into the prepared cake tin and bake for 45-50 minutes.

To make sure it's cooked thoroughly, place a skewer through the middle of the cake and it should come out clean. 
                                     
Leave the cake in it's tin to cool for 5 minutes and then transfer to a wire rack


Repeat these steps for the other 3 tiers, using the following ingredients and cooking times. 

For the 10 inch Vanilla Layer:
280g (10oz) Margarine
280g (10oz) Caster Sugar
5 Eggs
280g (10oz) Self Raising Flour, sifted
2 ½ Baking Powder, sifted
2 tsp Vanilla Extract

35-45 Minutes

For the 8 inch Chocolate Layer: 
225g (8oz) Margarine
225g (8oz) Caster Sugar
4 Eggs
180g (6oz) Self Raising Flour, sifted
45g Cocoa Powder, sifted
2 tsp Baking Powder, sifted
1 tsp Vanilla Extract

25-35 Minutes

For the 6 inch Vanilla Layer
140g (5oz) Margarine
140g (5oz) Caster Sugar
2 Eggs
140g (5oz) Self Raising Flour
1½ tsp Baking Powder
1 tsp Vanilla Extract

20-25 Minutes

For the chocolate layers, they are going to be decorated with butter icing. We made our batches of icing our of 500g of Sieved Icing Sugar and 250g of Margarine. Colour it with pink food colouring. Cover the inch in a thin layer of butter cream to seal any crumbs. Then use the technique I used in Beth's Rose Birthday Cake to create the rose look. For the 8 inch cake, I used 2 8 inch sandwich tine, but if your using 1 big 8 inch tin then cut the cake in half. Sandwich the two halves together with butter cream and repeat the steps for the 12 inch. By this time, you will have had to make more icing. 


When decorating, the vanilla layers are covered in white royal icing. Firstly, cover them in a very thin layer of butter cream. This is so that the royal icing sticks. Roll out some icing to a depth of 4mm. To find out a big to roll out, take a clean ruler and measure the length of the side, top and other side.

Place onto a rolling pin and lift up and onto the cake. Use a cake smoother to create a clean finish. Use a sharp knife to cut vertically down to remove excess icing at the base. Repeat with the cake smoother. 
Use this method for both vanilla cakes.

When stacking the cake layers, you must do this at your venue. To support our cake, we inserted straws into the bottom 3 layers and then placed the layers on top. This did work, but we could see that it started to sink after a few hours. So I would recommend watching this video as to how to stack your cake. 

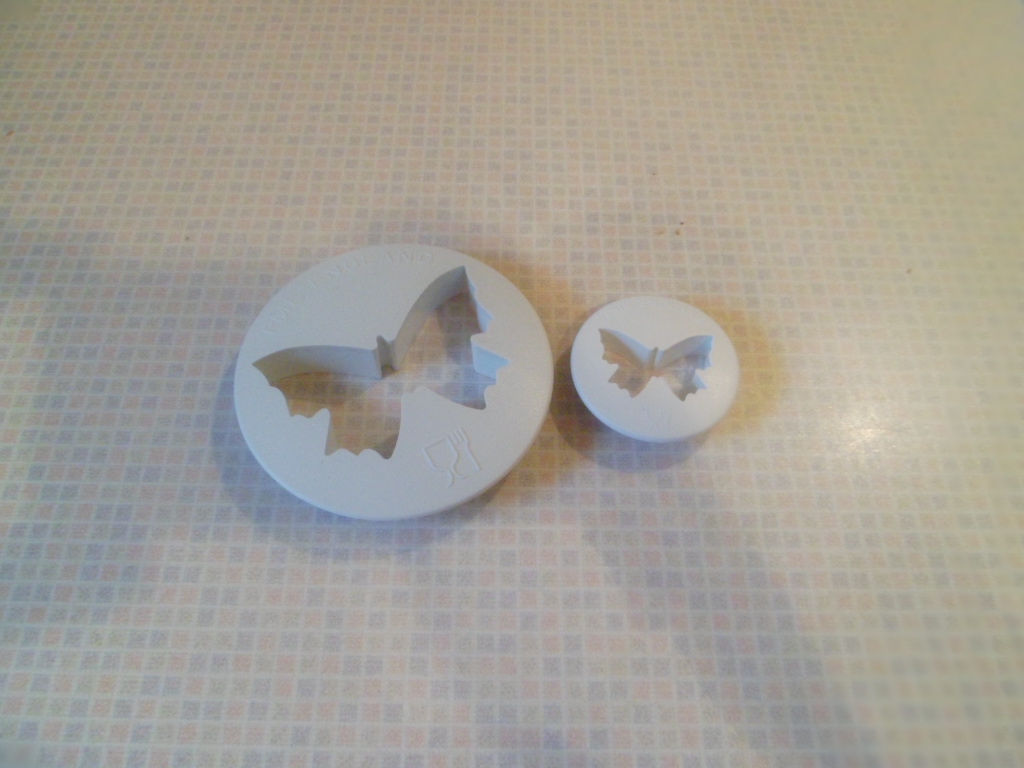
For extra decoration, I bought this butterfly cutter in a sale at Lakeland and I love it! The butterflies are so cute and were the perfect finishing touch. 
Simply, roll out some icing and cut the butterflies. For an extra finish, I layed them on creased cardboard to bend their wings so they looked more realistic. 


Happy Baking! 
x

Please leave a comment below! 
Follow @NicckkNackk


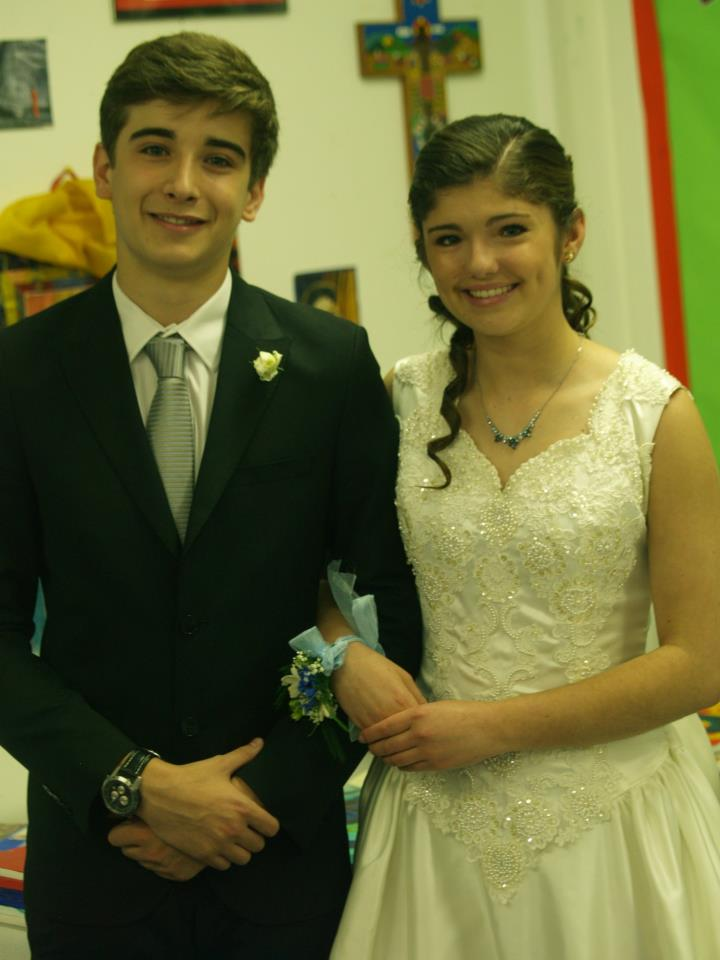
 P.S A picture of me and my friend millie :)


Sunday 8 July 2012

Classic Victoria Sponge

I've been looking for the perfect Victoria Sponge recipe for a while now, and I've finally found one. Funnily enough it wasn't in a fancy cookery book or on a well known website. My mum gets The Telegraph on a Saturday and sometimes they give away free cooking booklets and a while ago they had a one by the River Cottage. And it's brilliant! It's got a mixture of unusual cakes, the classics and new cakes to try. So I thought I'd give it a go and cook it for my acting company's tea break- Epsom Light Opera Company. (Visit our website: http://www.eloc.org.uk/) They were all very impressed and it went down a treat!

For the Sponge:
175g (6oz) Self Raising Flour, Sifted
Pinch of Salt
175g (6oz) Butter, Softened (I use Stork Margarine)
175g (6oz) Caster Sugar
3 Eggs, at room temperature
1 tsp Vanilla Extract

Preheat the oven to 180oC/356oF/Gas Mark 4. Grease 2 x 8inch tins and line the bottom with baking parchment/ Greaseproof paper.

In a bowl, beat the butter until creamy. For best results use an electric hand whisk. Add the caster sugar and continue to beat until the mixture is very light and creamy. This will help to blend the eggs.


Add 1 egg and a tbsp of flour and beat thoroughly. The flour helps to prevent the mixture from curdling. Repeat for the remaining 2 eggs. Mix in the vanilla extract with the last egg.


Fold in the rest of the flour until all is combined. The mixture should drop off the spoon easily when tapped against the side of the bowl. If not, add 1-2 spoonfuls of hot water.


Divide the mixture evenly between the two cake tins and bake for 25 minutes, until golden brown and will spring back when lightly pressed with a finger. Leave them to cool in their tins for a couple of minutes and then turn them out onto a wire cooling rack.


For the Filling:
60g Butter, room temperature
125g Icing Sugar, Sifted (Plus extra for later)
Strawberry Jam

Beat the butter until creamy. Add a third of the icing sugar and beat well. Repeat for the remaining icing sugar. Spread butter icing on top of the bottom layer. Spread a layer of jam onto the bottom of the other cake and sandwich together. To finish, sprinkle with icign sugar.


Variations can include:
  • Using a different flavour jam
  • Filling the cake with sliced strawberries and whipped cream
  • Replacing the jam with lemon curd and adding lemon juice and zest into the cake mixture
  • Replacing 25g of flour with Cocoa powder and replacing 25g of the icing sugar with cocoa powder to create a chocolate cake with chocolate buttercream


Happy Baking! 
x

Please leave a comment below! 
Follow @NicckkNackk


Monday 2 July 2012

Spinach and Sweet Potato Bake

Although my Mum and I aren't vegetarians, and do enjoy a tasty roast chicken or pub burger, we occasionally have "Veggie Nights". It might just be because we don't fancy meat or have had enough of it. So I started looking for some tasty vegetarian recipes and found this one. It's quite a simple recipe but is full of flavours. I gave it a try and it was a thumbs up from both my mum and me! 

To Serve 4:
500ml Single Cream
1 Garlic Clove (optional) [I left this out and it was still tasty]
Thyme or Rosemary (I used fresh rosemary from the garden)
250g bag of Spinach (can be frozen)
Freshly grated Nutmeg
Butter, for greasing
850g Sweet Potatoes (2 large ones)
Cheddar Cheese
Salt and Pepper

Heat oven to 200oC/400oF/Gas Mark 6.

Put cream, garlic and herbs into a small saucepan and bring to just below boiling. Take off the heat and season with salt and pepper and leave to infuse.

If using frozen spinach, place the spinach into a colander and pour over boiling water. Leave to drain for a few minutes then squeeze out as much water as possible.

Peel and slice the potatoes into medium thickness. Generously grease an ovenproof dish with butter and spread half of the potato slices across the bottom. Top with a layer of spinach. At this point, season with salt, pepper and some nutmeg. Too much nutmeg will overpower the other flavours.

Pour the cream mixture through a sieve to remove the garlic and herbs. Pour approx. one third of the cream onto the spinach, then cover with the remaining potato slices. Pour on the rest of the cream and top with grated cheese. 

Bake for 50-60 minutes or until golden brown, tender and that the potatoes are soft. 

Happy Baking! 
x

Please leave a comment below! 
Follow @NicckkNackk