About Me

My photo
Welcome to my blog- A place of food, cakes and bakes! Just a fun-loving student who loves to bake!

Monday, 9 September 2013

My Baking Bucket List

This is a bit of an unusual post as it's not a recipe or a review but a list of things I want to bake in the future. I'm interested in hearing whether you've baked any and what you'd recommended. Leave a comment below and tell me what you think!

Cakes
Apple/ Apple Crumble Cake
Carrot Cake
Rhubarb Cakes
Tiger Cake
Blueberry Muffin Loaf
Raspberry Torte
Blackberry and Apple Loaf Cake
Dark and White Fudge Cupcakes
Chocolate Cherry Layer Cake
Lemon and Elderflower Drizzle Cake
Chocolate and Cherry Layer Cake (Picture from www.cookingclub.com)

Desserts
Banoffee Pie
Lemon/Chocolate Soufflés
Chocolate and Raspberry Roulade
Queen of Puddings
Lemon Tart
Trifle
Chocolate Orange Cheesecake
Orange Tart
 
Chocolate and Raspberry Roulade (Picture from www.goodtoknow.com)


Other Sweet Things
Éclairs
Chocolate and Cherry Cheesecake Brownies
Macaroons
Whoopie Pies
Cake Pops
American Pancakes
Cranberry and Orange Scones
Rocky Road
Oat and Raisin Cookies
Scones that actually look like scones (I had a bit of a disaster with my last batch)
Millionaire Shortbread
Jammy Dodgers
Rocky Road (Picture from www.bbc.co.uk/food)

Bread
Brioche Dough
Cinnamon Breakfast Loaf
Pan au Chocolat
Breakfast Muffins
Sunflower Seed Rolls
Focaccia
3 Seed Crown Loaf
Rosemary and Sea Salt Focaccia (Picture from www.bbc.co.uk/food)


Wow that was a lot! better get started!
Happy Baking!
x

Thursday, 5 September 2013

Apple and Blackberry Muffins

I love this time of year as it's the start of the blackberry season! Blackberry picking is something I've done ever since I was little. At my dads I used to climb over this stone wall beside our garden, where there were the BIGGEST blackberry bushes. The blackberries were so juicy but often hard to reach, so out came the ladders and most memories of blackberry
picking involve balancing and nearly falling off. Unfortunately, the bushes were inhabited by wasps so I occasionally got stung in the process. Luckily there are loads of places to pick blackberries where I live, including a few in the garden. So really there's no excuse not to pick any. It also means I can make lots of delicious bakes using hand picked blackberries to distract me from the prospect that summer is over and it's time for school again. Although as I'm moving on to college now, I'm actually quite excited! 


My first blackberry bake is apple and blackberry muffins, as both me and my mum LOVE this flavour combination and I wanted to surprise her after her first day back at work (she works in a school). I know, call me the perfect daughter.. This recipe is from Maria's blog: The Godess' Daughter. It's a beautiful blog with so many lovely recipes. I suggest you take a look! 

This is the first time I've used oil instead of butter and although I think it would work in a denser, more moist cake, I thought that it was a little heavy for muffins, which as Mary Berry would say, should have a good crumb. However I still loved them! 

I halved the recipe, expecting it to make 9, but instead it made 11. 

100g Blackberries
1 and a half Bramley Cooking Apples
1 Egg
120ml Milk
60ml Vegetable Oil (I used sunflower)
100g Caster Sugar (Although I think 120-130g could be used)
180g Plain Flour, sifted 
2 tsp Baking Powder (If your mixture is looking quite dense or overloaded with fruit, use 3 tsp)
Half a teaspoon Cinnamon
Half a pinch of Salt
Demerara sugar to top

Preheat the oven to 200oC and fill a muffin tray with muffin cases. In a large bowl, mix together the egg, milk, oil and sugar until they are well combined. Add the flour and sift in the baking powder, cinnamon and salt and mix thoroughly. 
Core and dice the apples into small pieces and stir into the mixture along with the blackberries. Spoon the mixture into the cases and fill then to two thirds full. Sprinkle some brown sugar on top of each muffin. Bake for 20-25 minutes, until they're golden brown. Remove from the oven and leave in their tray for 5 minutes and then transfer them to a cooling wrack.

Happy Baking
x

Tuesday, 16 July 2013

Apple and Raspberry Meringue Pie with Sweetcrust pastry

Isn't this weather gorgeous?! With weather like this I think there's nothing better than fruity dessert to satisfy the taste buds- and this one is certainly full of flavour. It's a recipe from my favourite cookbook-Jo Wheatley A Passion for Baking- and as always Jo didn't let me down. Whilst looking back at some older posts I realised that my bakes weren't very adventurous with flavour so I've made a vow to start branching out with more flavoursome bakes, hopefully this is more interesting. I also love making meringue so this was my perfect summer bake!


For the the pastry you'll need:
225g Plain Flour, plus extra for rolling out
100g Unsalted butter or margarine
25g Icing Sugar
Pinch of Sat
1 egg yolk (reserve egg white for later)
3-4 tbsp Milk

If you have a food processor, put the flour, butter (diced), sugar and salt into the bowl and whizz with the pulse button until you have a breadcrumbs consistency. If like me you don't have a food processor, putt he flour, salt and sugar into a bowl. Before hand, freeze your butter/ margarine and then grate it into the bowl and use the "rubbing in" method to create a breadcrumbs consistency. Freezing the butter helps to keep the the butter/margarine from melting too quickly whilst using your hands. Add the egg yolk and 2 tbsp of milk and whizz/mix until the dough comes together. You may need more milk if mixing by hand. Turn out onto a lightly floured surface and work briefly into a ball. Chill in the fridge for approx. 20 minutes. 

Preheat the oven to 190oC/Gas Mark 5. Roll our your pastry into a disc with a thickness of about 2mm. I used a 21cm tart tin but this recipe is for a 23cm one. Line the tart tin carefully, being sure to push the pastry into all the corners. Trim off any excess. Prick the base several times. Screw up some baking parchment to line the pastry tin and fill with baking beans. (Screwing up the parchment helps the beans to sit easier.) Bake for 20-25 minutes until pale golden. Reduce the oven to 170oC/ Gas Mark, remove the beans and parchment and bake for further 5 minutes. 

For the filling:
3 Medium-Large Bramley Cooking Apples, peeled and sliced
30g Butter or Margarine
185g Caster Sugar
Zest and Juice of 1 Lemon
1 tbsp Cornflour
2 Eggs, separated
Egg white from Pastry
200-300g Raspberries

Meanwhile, add the apples, butter, 60g of the caster sugar and lemon juice and zest to a saucepan. Cook teh apples until they have become soft and puréed. Stir frequently. Remove from the heat and leave to cool slightly. Add the cornflour to the apple along with the two egg yolks. I found that there was a lot liquid with my apples so had to add a bit more cornflour. Beat until smooth and combined.


Spoon the apple into the pastry case and place the raspberries evenly on top. 


For the meringue, whisk the 3 egg whites in a clean, oil-free bowl until stiff. Gradually beat in the remaining 125g Caster Sugar, whisking well between each addition. The meringue should be stiff and glossy. Spoon the meringue on top of the apple and raspberries. 


Bake for 15-20 minutes, depending on how cooked you liked your meringue. I cooked it for 15 minutes but the meringue was very soft. I would be inclined to cook it for longer at a lower temperature to get a crunchy outside and chewy middle. Make sure you leave the pie to cool and then chill in the fridge before serving. I was too hasty when eating mine, so the filling hadn't set properly! 


I'm entering this into Tea Time Treats held by Lavender and Lovage and What Kate Baked with this month's host being Karen at Lavender and Lovage. This months theme is fresh fruit! 

Happy Baking! 
x

Please leave a comment below! 
Follow @niicolaalaa and @nicsfeasts on twitter and Niicolaalaa on Instagram

Wednesday, 3 July 2013

Rhubarb and Orange Custard Tart

I'm back! Things have been a little busy over the last 3 months what with exams and leaver's preparations so I apologize for being so quiet. I can assure you I'll make up for it! Since my last post in March, I have completed my GCSE's (finally!) after two years of near constant exams. My friends and I added up that we've spent about 30 hours in our exam hall. Think of all the baking you could do instead! I have also been to see my idol Olly Murs at the O2 as my birthday present from December. He was absolutely amazing and didn't fail to disappoint! Another show has been and gone as well- The Mikado, where I spent most of the week in a kimono and a very itchy wig! Spring also seems to be very popular for birthdays so it has been nice to celebrate leaving school with parties, our leaver's prom and yearbook!


This is a very tasty dessert which I made a while ago after lusting to make it for what seemed liked ages! It's from my trusty Baking Recipe Collection by Sainsbury's. 

You will need:
A batch of Shortcrust Dessert pastry
Flour, for dusting
400g Rhubarb
80g Granulated Sugar
30g Unsalted Butter, at room temeprature
3 tbsp Caster Sugar
3 tbsp Ground Almonds
Zest of 1 Small Orange
2 Large Eggs
75ml Double Cream
icing sugar, to dust

Roll out the pastry onto a floured surface and use to line an (approx.) 24cm tart tin. Cover with clingfilm and chill for 20 minutes. Preheat the oven to 160oC/gas mark 3. 

Wash and trim the rhubarb and cut to equal lengths of approx. 3 cm.  Sprinkle with sugar and bake for 15-20 minutes in the oven, until tender and just holding its shape. Leave to cool completely and straining the juices for later use.

Increase the oven to 200oC/gas mark 6. Line the pastry case with baking parchment and fill with baking beans or uncooked rice. Bake blind for 18-20 minutes, removing the parchment and beans for the last 5. Reduce oven to 180oC/gas mark 4. 

Meanwhile, cream the butter and caster sugar. Add the almonds and orange zest, then the eggs (one at a time). Add the double cream and 100ml of the reserved rhubarb juice. Stir gently.


 Spoon the baked rhubarb into the pastry base and pour over the cream mixture, making sure to not over fill it (mine is a little to full.) Bake for 35-40 minutes but make sure it's set in the middle and lightly brown. This is best eaten when at room temperature with a light dusting of icing sugar. 

Happy Baking! 
x

Please leave a comment below! 
Follow @niicolaalaa and @nicsfeasts on twitter and Niicolaalaa on Instagram


P.S Here's a picture of me and my girls at our prom! 


Saturday, 30 March 2013

Chocolate Mini Eggs Cupcakes For Easter

Me and my mum always celebrate Easter but it wasn't until this year that I realised all the baking opportunities! I just had to find something that used the iconic mini eggs! And so the Mini Egg Cupcakes were born (or should I say baked!) They were fun to make as I love the smell of chocolate cupcakes baking in the oven and I one or two eggs make have cheekily found their way into my mouth. Also, the actual cupcake has a lovely consistency and goes together really well with the fluffy butter cream. These were baked for my Godmother and her family, whom we always see at Easter. They went down very well for after dinner despite in being spoilt by her fabulous cooking!


This recipe is from one of my favourite books Cupcakes by Susanna Tee. This also had the recipe in for my Light and Fluffy Lemon Cakes
For the cupcakes: 
115g (4oz) Butter, at room temperature ( I used Stork Margarine) 
115g (4oz) Caster Sugar
2 eggs, at room temperature
85g (3oz) Self- Raising White Flour
25g (1oz) Cocoa Powder

Preheat the oven to 180oC/350oF/Gas Mark 4. Put 12 baking cases into a bun tray.

Place the butter and sugar into a bowl and beat together until light and fluffy. For best results, use an electric hand mixer. Sift in the flour and cocoa powder and fold in the mixture. To see how to fold, click here. Spoon the mixture into the paper cases until just under half full.

Bake the cupcakes in for 15-20 minutes until well risen and firm. Transfer to a wire rack to cool.

For the icing:
85g (3oz) Butter, at room temperature (I used stork)
175g (6oz) Icing Sugar, sifted
1 tbsp Milk
2-3 drops of vanilla essence
2 130g packs of Cadbury's Mini Eggs (or equivalent) 

Put the butter into a bowl and beat until fluffy. Add a third of the icing sugar and beat together until well combined. Repeat for the remaining icing sugar. Add the milk and vanilla extract and beat in well.

Put the icing into and icing bag, fitted with a large star nozzle and pipe around the edge of the cupcake to create a "nest" Place 3 eggs in the centre of each nest. I experimented and used a large star nozzle to get the lined effect on the nest but also used a different star nozzle to create the swirly look in the picture below. 

The Swirly Effect.


The Lined Effect.


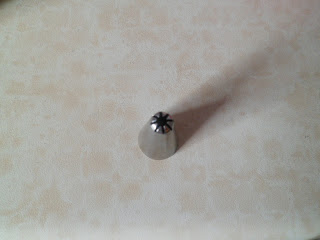
The large Star Nozzle.


The Swirly Star Nozzle.


Happy Baking! 
x

Please leave a comment below! 
Follow @NicckkNackk and @nicsfeats

Sunday, 3 March 2013

A Heavenly White Loaf

After the fail of my first loaf of bread didn't go quite to plan and didn't cook properly, I thought I'd try again with a recipe from Jo Wheatley. I thought this would be a good idea as so far all her recipes have worked out. I actually found the kneading of the dough really relaxing so it wasn't like hard work. And then the fact that it turned out well and tasted delicious was a bonus!


500g Strong White Bread Flour, plus some Plain Flour for kneading
3 large pinches of Sea Salt
3 large pinches of Caster Sugar
7g Dried Yeast
100ml Milk (Semi Skimmed or Full Fat)
200ml Water
25g Unsalted Butter, melted
1 Egg Yolk, beaten (optional)

Tip all the dry ingredients into a bowl and make a well in the centre. Heat the milk and water together until lukewarm. Add the melted butter and stir to combine.

If using a machine with a bread hook, combine the ingredients with a slow to medium speed until the dough comes together. If mixing by hand, use a wooden spoon or spatula. Continue to knead the dough for 7 minutes in the machine or for 10-12 minutes by hand until you have a smooth elastic dough.

Shape the dough into a ball and place in a large, lightly oiled bowl. Cover with clingfilm and leave in a warm place for about an hour or until it's doubled in size.

Tip the dough out onto a lightly floured surface and knead for 1 minute to knock back the dough. Mould it into a sausage shape and pop it into a greased 900g (2lb) loaf tin. Cover it with oiled cling film and leave to prove for 40-60 minutes until the dough has doubled and feels springy.

Preheat the oven to 200oC/400oF/Gas Mark 6.  If you choose to, gently brush the top of the loaf with egg and bake for 30 minutes. I noticed halfway through that it was looking very golden on top so I covered it with foil to stop it from burning. The loaf will be done when golden brown and the underside sounds hollow when tapped. 


Cool the loaf for 10 minutes in its tin and then transfer to a wire wrack to cool completely. Leave until cold before slicing. 


 Happy Baking! 
x

Please leave a comment below! 
Follow @nicsfeasts and @NicckkNackk


Sunday, 24 February 2013

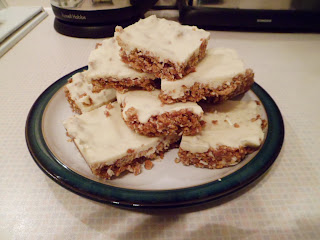
White Chocolate Tiffin

Whenever I'm out and about during half term, I always seem to visit Costa at least once and I am an absolute sucker for their chocolate tiffin! I love anything chocolatey anyway, but their tiffin doesn't help the cravings. So when I was looking through my new favourite cookbook, Jo Wheatley- A passion for baking, and found a recipe for chocolate tiffin, I knew I had to try it. And it didn't disappoint! It may not look as neat as the precisely cut picture in the book, but it was just as yummy! 


You'll Need:
125g Digestive Biscuits (Around 7)
30g Desiccated Coconut
30g Glace Cherries, washed and quartered
65g Unsalted Butter/Margarine
1.5 tbsp Golden Syrup
1 tbsp Malted Drink Powder- I used Ovaltine
1 tbsp Caster Sugar
250g White Chocolate (You may want to use 300g depending if you'd like lots of chocolate topping) 

Break the biscuits into halves and place in a freezer bag and using a rolling pin, crush them into smallish pieces, then tip them into a large bowl. Add the coconut and the cherries.


Put the butter, syrup, malted drink powder and sugar in a small saucepan. Place a low heat and stir constantly until the mixture is thoroughly combined. You will notice a distinct change in the mixture as it will thicken slightly and start to bubble. Pour this mixture over the biscuits and stir until evenly coated. 

Spoon the mixture into a greased and lined baking tin- I used a         . Press the mixture down firmly into an even layer and leave to cool completely. 


Break the chocolate into even sized pieces and melt in a bowl over a pan of simmering water. Stir to get a smooth consistency and pour over the biscuit base. Leave to set completely
Cut the tiffin into squares (I made 9) using a knife that has been run under hot water as this will make it easier to slice through.

 Happy Baking! 
x

Please leave a comment below! 
Follow @nicsfeasts and @NicckkNackk


Wednesday, 20 February 2013

Valentine's Cupcakes

I love it when there's an excuse to bake something really yummy and this time it was cupcakes for a Valentine's Cake Sale we had at school. I may have mentioned it before that in June we have a Leaver's Ball for reaching the end of our time in secondary school, and the prom committee and I are trying different ways to raise money to go towards the cost. We held a cake sale and everyone made (or bought) cakes and biscuits to sell and we made £92! So we were very pleased and it is definitely something we will do again- especially as it's an excuse to get baking! 


The vanilla cupcakes are made from half the mixture used in my Christmas Cupcakes, a recipe from The Great British Bake Off: How to Turn Everyday Bakes into Showstoppers and the same method.

For the chocolate cupcakes, you'll need:
60g (2oz) Butter or Margarine, at room temperature
60g (2oz) Caster Sugar
1 Egg, lightly beaten
45g (1½ oz) Self-Raising Flour, sifted
15g Cocoa Powder, sifted

Preheat the oven to 180oC/350oF/Gas Mark 4 and put 17 cupcake cases or 12 muffin cases into two cupcake trays. 
Beat the butter/margarine and sugar together until light and fluffy. Gradually add the egg, a little at a item and beat thoroughly in-between additions. Fold in the cocoa powder and flour.
Spoon the mixture into the cases and bake for 15-20 minutes. They should be springy and firm to touch. Transfer to a wire wrack and leave to cool.

 For the icing:
140g (5oz) Butter/Margarine, at room temperature
280g (10oz) Icing Sugar, sifted

Beat the butter/margarine until smooth and light. Add the icing sugar a little at a time and beat until well combined. The longer you beat it, the fluffier it will be! Split the mixture in half and add half a tablespoon of cocoa powder to the chocolate icing and a few drops of pink food colouring to the other.
Pipe onto cupcakes and decorate with sprinkles!

 Happy Baking! 
x

Please leave a comment below! 
Follow @nicsfeasts and @NicckkNackk


Tuesday, 29 January 2013

Chunky Chocolate Cookies

Well that's another year gone, and I have to admit, for the first time I was a bit nostalgic about seeing 2012 go. It was a really good year for me; I was bridesmaid for my cousin, we had the Olympics, I got my first principle part in a show, I was made Head Girl, had a good academic year and generally a good time. What was your favourite 2012 moment? Also, the beginning of 2013 didn't look too inviting: January exams (which in my opinion should be illegal), more exams and oh yes, more exams. School definitely likes to load on the pressure. And if I hear my head of year say "This is it" again over this being our last few months at school, I will not be responsible for my actions! On a more positive note, we're organising the yearbook and we have our prom! I can't wait! 

These cookies are from Jo Wheatley's A Passion for Baking. She was the winner of 2011's GBBO and there are so many things I can't wait to bake. In the book, it says this recipe make 10 but I halved the recipe and made 7 cookies roughly 4 inches in diameter, which I found quite big. So using this mixture will probably make 14/15 big ones or 20 smaller ones. 

200g Unsalted Butter, softened
200g Light brown Sugar (I used light brown sugar for both quantities)
125g Demerara Sugar
2 Large Eggs, beaten
1tsp Vanilla Extract
400g Plain Flour
1 tsp Baking Powder
1 tsp Bicarbonate of Soda
a pinch of Salt
200g Dark Chocolate, cut into small chunks

Preheat the oven to 170°C/325°F/Gas Mark 3 and cover 3-4 baking trays with baking parchment or greaseproof paper. 

Cream the butter and both of the sugars together until pale, light and fluffy. Gradually add the beaten eggs, mixing well between each addition. Scrape down the sides to combine all of teh mixture. Add the vanilla extract and mix again.

Sift in the flour, bicarbonate of soda, baking powder and salt into the bowl and mix again until thoroughly combined. Fold in the chocolate chunks.

To get even sized cookies, I gathered the dough into a ball and halved it. I kept halving each section until I got the size I wanted. Roll each division into a ball and flatten to a depth of 1.5 cm and place them onto a baking tray, evenly spaced as they will expand by at least half. Alternatively, you could use an ice-cream scoop to get even sized cookies. 

Bake the cookies in batches in the middle of the oven for 5 minutes. Take them out and bang the tray sharply on a work surface to deflate the cookies and et rid of air bubbles. Continue to bake for a further 7-8 minutes for gooey cookies or 8-10 for slightly crispy cookies. 

Allow the cookies to cool a little on their baking tray before transferring to a wire wrack to cool completely  Store in an airtight container to prevent them going stale.


Happy Baking! 
x

Please leave a comment below! 
Follow @nicsfeasts and @NicckkNackk


Saturday, 22 December 2012

Christmas Cupcakes

Christmas has really started for me now. At school, we've had the Christmas carol service, at my acting company we've had our Christmas party and I've finally broken up from school! I'm really looking forward to a Christmas break with my family and lots of food! 

This is from my new book, The Great British Bake Off: How to Turn Everyday Bakes into Showstoppers. I was such a avid follower of the show that I had to have the book! So my good friend Beth bought me it for my birthday. This recipe is called English Summer Cupcakes.

For the cupcakes, you'll need:
125g (4½oz) Unsalted Margarine or Margarine, at room temperature
175g (6oz)Caster Sugar
2 Large Eggs, at room temperature
½ tsp Vanilla Extract
175g (6oz) Self-Raising Flour
Good pinch of salt
3 tbsp Milk

Preheat the oven to 180oC/350oF/Gas Mark 4.  Beat the butter in a bowl until creamy. Gradually beat in the sugar and beat for 4-5 minutes so that it's very light and fluffy.

Beat the eggs with the vanilla and then add the mixture a little bit at a time beating well in-between each addition. Make sure you scrape the sides of the bowl to include all the mixture. Sift the flour and salt into the bowl and add the milk. Gently fold together.

Spoon the mixture into the cases and distribute evenly. Bake for 20 minutes until golden brown and risen. Leave the cakes to cool in their tins for a couple of minutes, then transfer them to a cooling wrack. 

For the icing: 
125g (4½oz)Unsalted Butter or Margarine
400g (14oz) Icing Sugar
3-4 tablespoons of Milk
Red, Green and Blue food colouring
Christmas Decorations

In a bowl, beat the butter until it's light and creamy. Gradually sift the icing sugar in and beat in. When all teh icing sugar has been mixed, divide the mixture into 3. For the first batch of icing, colour it red and ice 4 cupcakes using a palette knife. I decorated mine with snow and snowmen. 

For the blue icing, I used an icing nozzle shaped like a cross and used to create a swirling spiral effect. 

With last batch of icing, keep a little bit spare as the normal colour. Spread a layer of this on the remaining 4 cupcakes. Colour the remaining icing green. Using a star nozzle, pipe a wreath in short bursts of icing. Using a small round writing nozzle, use some left over red icing (or a red writing pen) to create the ribbon and berries. 


Last Christmas I made a whole batch of wreath cakes: 


Happy Baking and Merry Christmas!
x

Please leave a comment below! 
Follow @nicsfeasts and  @NicckkNackk

P.S Here's a picture of me and my friends at my 16th birthday meal!