About Me

My photo
Welcome to my blog- A place of food, cakes and bakes! Just a fun-loving student who loves to bake!

Saturday, 15 September 2012

Lemon Chicken and Roast Vegetables on a bed of Couscous

I've always been a fan of Mediterranean vegetables and so this was a very simple, quick and easy recipe to cook when I offer to cook dinner (which admittedly, isn't very often!) I always find cakes and puddings so much more interesting as I've found that you can think up a meal in seconds with what's in the fridge, where as producing a cake is more like an art form. Am I alone in thinking this? I'm not saying that savoury cooking is boring, it's far from it, but I don't get as much pleasure from pouring over savoury recipes than sweet. 

It was not long ago that I discovered my love for couscous; when I found out how easy it is to make it was an added bonus! It certainly makes a change from when you don't fancy stodgy potatoes or chips. And so chicken seemed like the obvious answer to pull this meal together, with a few added flavourings.  


To serve 2, you'll need:
Half a Red Onion
1 Courgette
Half a Red Pepper
Half a Yellow Pepper
Handful of Cherry or Vine Tomatoes
Olive Oil
2 Chicken Breasts
1 Lemon
Oregano
Half a chicken or Vegetable Stock Cube
250ml (approx.) Boiling Water
200g (approx.) Dried Couscous

Preheat the oven to 200oC/400oF/Gas Mark 6. Chop up the vegetables into chunky pieces and place in a roasting tin. Drizzle over some olive oil. Prick the chicken breasts and squeeze over some lemon juice and sprinkle on the oregano. Place 2 slices on lemon on top. Lay some foil in another roasting tin and put the chicken inside. Drizzle over some olive oil and close the foil over the chicken, creating a little parcel.

Place both tins into the oven and roast for 35-45 minutes. The vegetable should be soft and beginning to char and the chicken should no longer be pink. Before serving dissolve the stockcube into the boiling water ans pour over the couscous in a jug and leave to absorb. This should take 5 minutes. Drain away any excess liquid from the couscous and serve.


Happy Baking! 
x

Please leave a comment below! 
Follow @nicsfeasts and  @NicckkNackk

P.S  I am in a show at the Epsom Playhouse called Half A Sixpence with Lottie from Lottie's World of Cakes and Bakes from Tuesday 9th-Saturday 13th October. We play the parts of two shopgirls called Kate and Flo!


Sunday, 9 September 2012

My First Loaf of Wholemeal Bread

After watching of Lorraine Pascale's cookery programs, she's really got me inspired to bake bread. Admittedly, her bakes are usually flavoursome foccacias or tear-and-share bread but I chose to make a standard wholemeal loaf. Thought it would be a simple way for getting a feel for bread making.  But I would like to start experimenting with different flavour combinations and ways of getting the perfect crispy crust and soft inside. I was almost baking blind with this as all I had was a simple recipe, a couple of tips and no experience. It went quite well, except it could have done with a bit longer in the oven! So any bread making secrets you have, I would be grateful for them!


You'll need:
500g (18oz) of Wholemeal Bread Flour
1 7g Sachet of Dried Yeast
1 ½ tsp of Salt
2 tbsp Runny Honey
3 tbsp Sunflower Oil
250ml Warm Water (extra may be needed) 

Put the flour, salt and yeast in a bowl. Make a well/hole in the middle and pour in the honey and oil. A tip for the honey is to put your spoon under hot water from the tap to warm it. This makes the honey slip off the spoon easier. Add the water and mix into a soft dough. I found the dough a bit dry so I added a touch more water.
Once you dough has come together, put it onto a lightly floured surface and knead for 10 minutes. Once finished, put your dough into a greased loaf tin and cover with cling-film. Put it in a warm place to prove for 45-60 minutes or until it's doubled in size. When I made a loaf of bread mix before, I used the airing cupboard but I was luckily enough to have a very sunny windowsill. You could almost watch it rising! 


Preheat the oven to 220oC/430oF/Gas Mark 7. When watching Lorraine, I noticed her putting a tray of water in the bottom of the oven to create a steamy environment. I think this lets the bread rise before the crust become hard and crusty and stops it. But I think I may stop this until I more comfortable with making bread and know a bit more about it. When you put the loaf in, turn the oven down to 200oC/400oF/Gas Mark 6. The recipe said to bake for 25-30 minutes but I would say 30-40 minutes. It will be ready when golden brown and the bottom should sound hollow when tapped. Turn it out and leave to cool on a coolign rack. 

Happy Baking! 
x

Please leave a comment below! 
Follow @nicsfeasts and @NicckkNackk


Sunday, 2 September 2012

Irresistible Squidgy Chocolate Brownies

You will need:
200g (7oz) Dark Chocolate (Preferably 70% cocoa solids)
150g (5oz) Butter/Margarine, at room temperature
3 Eggs, at room temperature
225g (8oz) Caster Sugar
100g (3½ oz) Plain Flour, sifted
1 tsp Baking Powder
1-2 tbsp Cocoa Powder, sifted


Preheat oven to 180oC (fan 160oC/350oF/Gas Mark 4). Line a 8 inch square tin with greaseproof paper- although I used 7.5 and it worked. Add the butter/marg and half of the chocolate to a heatproof bowl and sit over a pan of gently simmering water to melt the ingredients, stirring occasionally. When melted, leave to one side to cool.

Add the eggs and sugar to another bowl and mix until creamy. Now fold in the cooled chocolate mixture, then the flour and finally the baking powder and cocoa.

Chop the remaining chocolate into small chunks and stir in 3/4 of the chocolate into the mixture. Pour the mixture into your prepared tin and level the surface. Sprinkle the left over chocolate chunks evenly on top, pushing slightly into the mixture.

Put in the oven and bake for 35-40 minutes, until the top is starting to crust. Remove and leave to cool before slicing it into 12 big pieces or 16 smaller pieces.


Happy Baking! 
x

Please leave a comment below! 
Follow @nicsfeasts and @NicckkNackk


Wednesday, 29 August 2012

Zingy Zesty Lemon Meringue Pie

My love for lemon is never ending! It's refreshing, tasty, versatile  and oh so simple. I've wanted to make a lemon meringue pie for a while now; ever since seeing an amazing picture in a food magazine. It was of a slice of pie with a perfectly structured lemon layer and then this mountain of pillowy, marshmellowey, I-want-to-eat-that-now-ey meringue on top. I'd said to my mum that I'd had enough of baking cakes for a while and was moving on to puddings. What with going to visit my Auntie for a few days, this seemed like the perfect opportunity to make one. I also wanted to practise making pastry and this recipe required baking blind, which I'd never done before, but there's always a first for everything!  So after a busy day catching up with a friends, it was lovely to return to the kitchen and do some good ol' baking.

 For the Pastry, you'll need:
250g (9oz) Plain Flour, sifted, plus extra for dusting
1 Tablespoon of Icing Sugar, sifted
125g (4oz) Unsalted Butter/Margarine, chilled and diced
1 Egg, beaten with half a tablespoon of chilled water

If you have a food processor:
Whizz the flour, sugar, and diced butter/marg until it resembles breadcrumbs.

If not, mix the flour and sugar together and then add the diced butter/marg. With your fingertips, rub the flour mixture and butter/marg together until you have a breadcrumb consistancy. Be light on the fingers and pick out any lumps and rub them to make them smaller.


In a large bowl, add the egg mixture to the breadcrumbs and stir with a palette knife. Using your hands, bring the mixture together to form a dough, adding a SMALL bit of extra water if the pastry seems dry. Work it into a ball, wrap in cling-film and leave it to rest in the fridge for 30 minutes. I was in a bit of a hurry, so I did 15 minutes in the freezer.

Preheat the oven to 180oC/Gas Mark 4. On a floured surface, roll out the pastry to a thickness of just under a £1 coin. Line a fluted tart tin (24/23cm) , loose bottomed being best, with the pastry. I used my finger tips to work the pastry into the grooves of the tin, and then a sharp knife to cut off excess pastry. Prick the base with a fork and place into the freezer for 10 minutes to firm up. If there's no room in the freezer, 15-20 minutes in the fridge will do.


After 10 minutes, place some greaseproof paper into the tin and fill with baking beans or rice and bake blind for 15 minutes or until the edges are firm. Remove the greaseproof paper and beans/rice and bake for a further 5-10 minute or until lightly golden brown. 


For the filling, you'll need:
the Zest and Juice of 3 lemons
40g (1.5oz) Cornflour, sifted
100g (3.5oz) Caster Sugar
275ml Water
50g (2oz) Butter/Margarine
5 Egg Yolks (Whites to be used later)

Stir the lemon juice and zest with the cornflour and caster sugar, until a smooth paste is formed. Bring the water to boil in a pan and add the lemon mixture. Keep stirring until it has thickened and then simmer for 1 minute, stirring continuously.  (Note: The mixture will very suddenly thicken and then start to bubble. At this point, turn the heat down to a simmer.) Remove from the heat and beat in the butter/marg, followed by the egg yolks, until smooth. Leave to cool and then pour into the pastry case. 


For the Meringue, you'll need: 
5 Egg Whites
250g (9oz) Caster Sugar
2 Teaspoons Cornflour

Use an electric hand mixer to beat the egg whites until they become stiff. Add the caster sugar in 4 stages, beating thoroughly each time and until it's stiff and shiny. Whisk in the cornflour. Spoon over the filling and use a fork or skewer to create a swirly design. Place on a baking tray and bake for 20-30 minutes at 130oC at the bottom of the oven. 
 
And it seemed to be a hit with my family too! 


Happy Baking! 
x

Please leave a comment below! 
Follow @nicsfeasts and @NicckkNackk


I'm entering this into Calendar Cakes by Dolly Bakes and Laura Loves Cakes as this month's theme is British Summertime and lemon is just so summery and fruity.

Also, into Lottie's World of Cakes and Bakes challenge- Lottie's Bake Off Challenge as this weeks theme on The Great British Bake Off was pastry.


Thursday, 23 August 2012

Strawberry Pavlova


Now if someone asked me what my favourite pudding was, it would be Strawberry Pavlova every time. It's perfectly summery and really tasty! Strawberries have always been one of my favourite fruit so I love nearly anything with them in and the crunchy meringue complements the softness of the cream and fruit. This was my first time at making meringue and was really happy at how it turned out. I'd always thought of meringue as a bit of challenge when people talk about "Stiff peaks" but now I love making it and am going to make a Lemon Meringue Pie for my Auntie at the weekend (post to follow!) And did you know that this pudding is originally from New Zealand- me neither! 


This recipe is from my Mum's trusty Delia Smith's Complete Cookery Course.

You will need:
3 Large Fresh Egg Whites
175g (6oz) Caster Sugar
275ml (half a pint) Whipping or Double Cream (I used a 300ml pot)
Strawberries (Or any other fruit you want to add)

Preheat the oven to 150oC/300oF/Gas Mark 2.  Line a baking sheet with greaseproof paper and grease lightly with oil/butter/margarine. 

Place the egg whites in a clean bowl and whisk until soft peaks form. This will be when the mixture looks like it has little mountains in it. Start to whisk in the sugar, a little at a time until all the sugar is combined. By now the peaks will have become stiffer- when you tip the mixer upright, they should stand up. 

Spoon the meringue mixture onto the baking sheet forming a circle with a little dip in the middle. (This will be where the fruit sits) To make the meringue look decorative, you can take a skewer or fork and create swirls and peaks around the edge. 

Place the baking sheet in the oven and immediately turn it down to 140oC/275oF/Gas Mark 1 and leave to cook for an hour. After an hour turn the oven of but keep the meringue inside until the oven has completely cooled. This is to allow the meringue to completely dry out and can take from 2 hours. 

When the meringue is ready, gently peel it off the baking paper and put it onto the serving dish. In a bowl whip up the cream- personally I like it quite thick. Spread the cream onto the meringue and arrange the strawberries on top. Serve with a little icing sugar on top. 

Happy Baking! 
x

Please leave a comment below! 
Follow @nicsfeasts and @NicckkNackk


I am entering this into my first Blog Event- Simple and In Season by Ren at Fabulicious Food. 


I am also entering this into Calendar Cakes by Dolly Bakes and Laura Loves Cakes because it's the perfect summer pudding! 


And into Let's Cook With Fruits by Simply Food


P.S Earlier on in August I went to the Bristol Hot Air Balloon Fiesta with my friend Sarah. (She also appears in Pretty Pink Wedding Cake) We saw some amazing sights but we particularly like the Churchill one! 


Tuesday, 21 August 2012

I'm Back... and So's the GBBO!

Well firstly I will apologize for my lack of posts recently as I've been away a lot and desperately caught up within all the Olympic hype! I love sport and so being able to watch it in our home country was amazing. Although my mum and I were unable to get tickets, I still cheered on Team GB and was glued to the telly (even while camping!). I'm also a big fan of Tom Daley so to see him get a bronze was great. I was also happy for Mo and Jess Ennis in succeeding in their bid for gold.


Anyway, enough about sport. I promise that there will be a recipe blog coming soon but I was equally excited about the return of The Great British Bake Off on Tuesday nights. Last week saw a delight of upside-down cake, rum babas and a cake that produces a hidden design when sliced into. Now, being born in the 90's meant that I was unfamiliar with Rum Babas but I think they look delicious; although my mum says she'll never go near one! I've also decided I might try one of the upside down cakes off of the show. John's Toffee Apple Upside down cake caught my eye, as well as Manisha's Vanilla, Peach and Raspberry Upside down and Sarah-Jane's Pear, Chocolate and Hazlenut Cake. I can't wait for tonight's episode which is all about Bread.


Another one of my favourite chef's is back on our screens and she is Lorraine Pascale. She first caught my attention with he show "Baking Made Easy"  and "Lorraine's Last Minute Christmas" but she is back with "Lorraine's Fast, Fresh and Easy Food". Last night's episode was about feel good food. I looovee feel good food. Some of her mouth watering recipes shown were Butternut and Sweet Potato Lasagne, her Shameless Shortcut Cake Pops (a playful looking biscuit-based chocolate lolly) and Sweet and Sour Pork Balls.

Happy Baking! 
x

Please leave a comment below! 
Follow @nicsfeasts and @NicckkNackk


Thursday, 26 July 2012

Saucy Lemon Puddings


The sun has got his hat on! Hip hip hip hooray! Finally, some well-deserved sun! Having broken up from school for 6 weeks now (lucky, I know) it was great to start off the holidays with such lovely weather. 
Now, I am someone who defiantly has a sweet tooth and I love my puddings. But in this heat, you don't often want a heavy, stodgy dessert to make you feel bloated. This pudding is perfect for that sweet summery satisfaction but without the guilty feeling after. It has a gorgeous saucy base with a light sponge topping so it feels satisfying and refreshing. 


For 4 puddings, You will need:

50g (2oz) Butter/Margarine
125g (4oz) Caster Sugar
Zest and Juice of 2 lemons 
2 Eggs, separated
40g (1½oz) Self Raising Flour, Sifted
300ml Milk
1 tbsp Icing Sugar


Preheat the oven to 180oC/160oC Fan/Gas Mark 4. Grease 4x200ml oven-proof dishes. 


Put butter, caster sugar and lemon zest in a bowl and cream together until light and fluffy. Gradually whisk in the egg yolks and then fold in the flour. Stir in the milk and lemon juice.
In a separate clean bowl, whisk the egg whites until they are softly peaking. Gently fold them into the mixture. 


Spoon the mixture into the greased dishes and stand them in a roasting tin. Fill the roasting tin with boiling water until it reaches half way up the sides. Bake for 25 minutes until the top is golden. Dust with icing sugar to serve. 


An alternate option is to use 1 lemon and 1 lime to give it a different citrus flavour! 


Happy Baking! 
x

Please leave a comment below! 
Follow @NicckkNackk


Saturday, 21 July 2012

Delicious Mediterranean Chicken Tray Bake

My mum's got quite a few handy friends when it comes to cookery and one of them recycles all her cookery magazines by giving them to me- A lovely gesture, and it's eco-friendly! Pouring over them is a great way to find new recipes and tips and this was one that I found in BBC's Good Food Magazine. I would really recommend it! It's full of good ideas and new things to try and well as the old family favourites. The more confident chef might find the recipes a bit tedious, but they're just right for me! 
It was simple to make and turns out to be a really tasty mid-week meal. The garlic cheese really compliments the roasted vegetables and the simple rice contrasts from the bold flavours of the other ingredients. I think the colours also look amazing, as there's nothing worse than a dull-looking meal; it makes it look so unappetizing. 


To Serve 4:
2 Red Peppers
1 Red Onion
4 Chicken Breasts (Optional to remove the skin)
150g pack of Garlic and Herb Soft Cheese (You can also use a garlic cheese like Boursin)
Cherry Tomatoes
Handful of Black Olives
Olive Oil

Preheat the oven to 200C/180C fan/ Gas Mark 6. De seed the peppers and cut into chunks. Cut the onion in wedges and mix together with the pepper in a baking tray. Drizzle with oil. Cook for 10 minutes. 

Cut a horizontal slit into the chicken breasts and push equal amounts of the cheese into them. Smooth the slit and brush with oil. Add them to the tray along with the tomatoes and olives and season. Return to the oven and cook for a further 25-30 minutes, until the chicken is fully cooked.

Serve with rice white. I won't include quantities as I don't actually weight out rice. But I usually cook it for short bursts in the microwave on a lower heat setting. 

This meal would also go lovely on couscous and you could add some green vegetables, for instance mange taut, to add even more colour! 

Happy Baking! 
x

Please leave a comment below! 
Follow @NicckkNackk


The picture above is from BBC's Good Food Website as mine didn't turn out very well!


Saturday, 14 July 2012

Pretty Pink Rose Wedding Cake

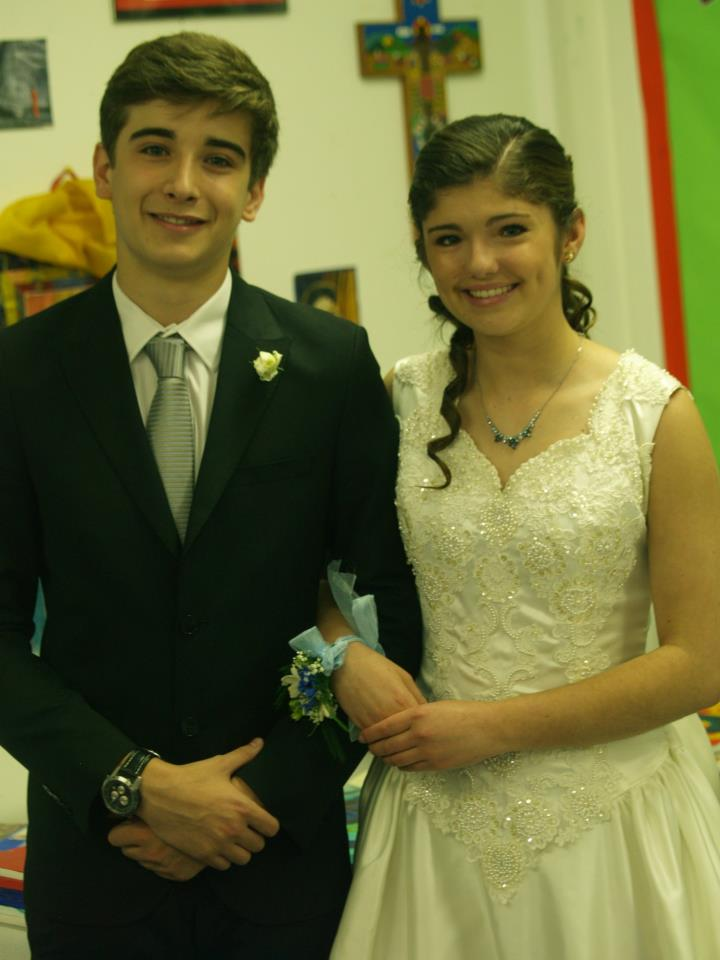
It's become a tradition at my school, that when you reach Year 10, the whole year puts on a mock wedding.  Now, whenever I mention this to someone, I always get the same reaction. The puzzled look. Why would a school hold a mock wedding? It's strange I know. And I'm not totally sure why we do it. We are a Church of England school and part of our R.E (religious education) GCSE is to do with Christian Weddings and Divorce. It's also ran by the students who took long course R.E (meaning the get a full GCSE in it, as opposed to half). So they organise it and have first pick of the roles. Yes, there's the bride, the groom, ushers, bridesmaid, the whole shoobang really. One of my good friends, Clare, was picked to be the bride and she looked amazing!    
  

Most of my friends ad become involved. One was the photographer, another the hair stylist, one in the band and then two in the bridal party. So I offered to make the wedding cake along with two other friends. Originally I hadn't realised what a big task it was. And our R.E teacher assured me it had been done well in the past so we had to impress. The first mammoth task was to find a recipe and the correct cake tins. It was harder than you think. But with help from teachers and my mums friends we got a 12 inch, a 10 inch, an 8 inch and a 6 inch. The next part was the fun part; Designing the cake! And we weren't short of ideas.


We decided to match the colour scheme of pink and go for sponge as fruit cake was expensive and we were on a budget! We used butter icing for the two chocolate layers and royal icing for the 2 vanilla layers.

For the 12 inch Chocolate layer:

340g (12oz) Margarine, at room temperature
340g (12oz) Caster Sugar
6 eggs
170g (6oz) Self Raising Flour, sifted
70g Cocoa Powder, sifted
3 tsp Baking Powder, sifted
1 tsp Vanilla Extract

Preheat the oven to 180oC/356oF/ Gas Mark 4. Grease and line the cake tin with greaseproof paper or baking parchment. 


Cream the margarine and caster sugar together in a bowl until light and fluffy.

 Add 2 eggs wit ha heaped tablespoon of the flour. Beat well. For best results use an electric hand whisk. Repeat for all 6 eggs. 
Fold in the remaining flour, the baking powder, the cocoa powder and the vanilla extract using a large metal spoon. When all the ingredients are combined, pour into the prepared cake tin and bake for 45-50 minutes.

To make sure it's cooked thoroughly, place a skewer through the middle of the cake and it should come out clean. 
                                     
Leave the cake in it's tin to cool for 5 minutes and then transfer to a wire rack


Repeat these steps for the other 3 tiers, using the following ingredients and cooking times. 

For the 10 inch Vanilla Layer:
280g (10oz) Margarine
280g (10oz) Caster Sugar
5 Eggs
280g (10oz) Self Raising Flour, sifted
2 ½ Baking Powder, sifted
2 tsp Vanilla Extract

35-45 Minutes

For the 8 inch Chocolate Layer: 
225g (8oz) Margarine
225g (8oz) Caster Sugar
4 Eggs
180g (6oz) Self Raising Flour, sifted
45g Cocoa Powder, sifted
2 tsp Baking Powder, sifted
1 tsp Vanilla Extract

25-35 Minutes

For the 6 inch Vanilla Layer
140g (5oz) Margarine
140g (5oz) Caster Sugar
2 Eggs
140g (5oz) Self Raising Flour
1½ tsp Baking Powder
1 tsp Vanilla Extract

20-25 Minutes

For the chocolate layers, they are going to be decorated with butter icing. We made our batches of icing our of 500g of Sieved Icing Sugar and 250g of Margarine. Colour it with pink food colouring. Cover the inch in a thin layer of butter cream to seal any crumbs. Then use the technique I used in Beth's Rose Birthday Cake to create the rose look. For the 8 inch cake, I used 2 8 inch sandwich tine, but if your using 1 big 8 inch tin then cut the cake in half. Sandwich the two halves together with butter cream and repeat the steps for the 12 inch. By this time, you will have had to make more icing. 


When decorating, the vanilla layers are covered in white royal icing. Firstly, cover them in a very thin layer of butter cream. This is so that the royal icing sticks. Roll out some icing to a depth of 4mm. To find out a big to roll out, take a clean ruler and measure the length of the side, top and other side.

Place onto a rolling pin and lift up and onto the cake. Use a cake smoother to create a clean finish. Use a sharp knife to cut vertically down to remove excess icing at the base. Repeat with the cake smoother. 
Use this method for both vanilla cakes.

When stacking the cake layers, you must do this at your venue. To support our cake, we inserted straws into the bottom 3 layers and then placed the layers on top. This did work, but we could see that it started to sink after a few hours. So I would recommend watching this video as to how to stack your cake. 

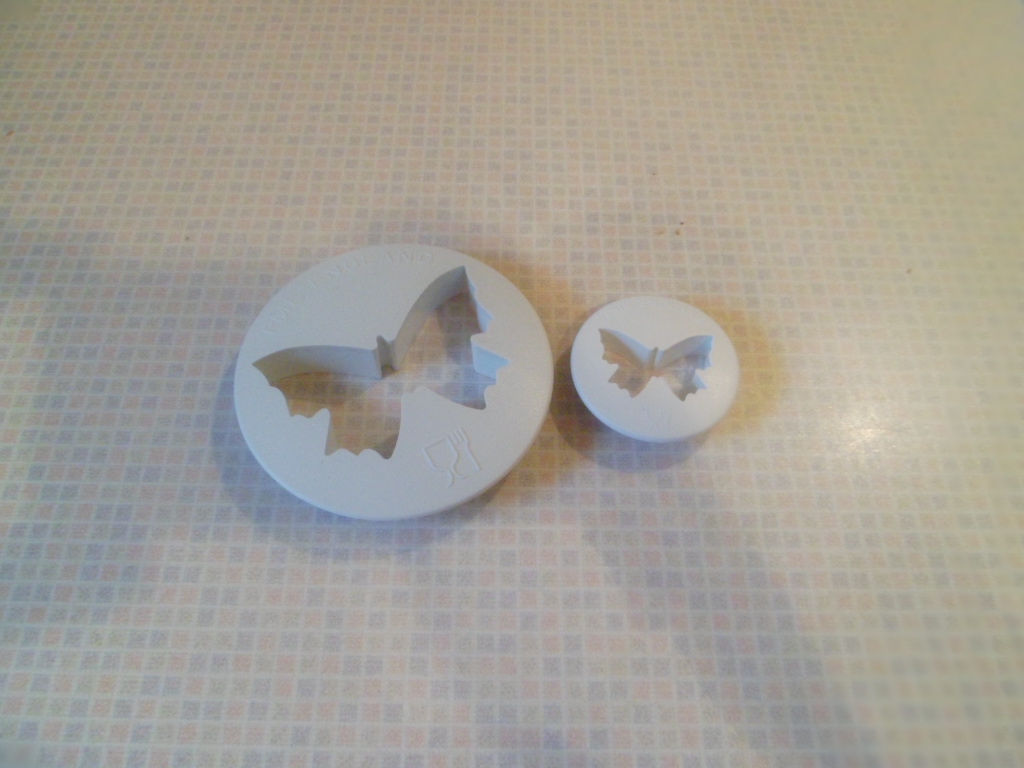
For extra decoration, I bought this butterfly cutter in a sale at Lakeland and I love it! The butterflies are so cute and were the perfect finishing touch. 
Simply, roll out some icing and cut the butterflies. For an extra finish, I layed them on creased cardboard to bend their wings so they looked more realistic. 


Happy Baking! 
x

Please leave a comment below! 
Follow @NicckkNackk


 P.S A picture of me and my friend millie :)


Sunday, 8 July 2012

Classic Victoria Sponge

I've been looking for the perfect Victoria Sponge recipe for a while now, and I've finally found one. Funnily enough it wasn't in a fancy cookery book or on a well known website. My mum gets The Telegraph on a Saturday and sometimes they give away free cooking booklets and a while ago they had a one by the River Cottage. And it's brilliant! It's got a mixture of unusual cakes, the classics and new cakes to try. So I thought I'd give it a go and cook it for my acting company's tea break- Epsom Light Opera Company. (Visit our website: http://www.eloc.org.uk/) They were all very impressed and it went down a treat!

For the Sponge:
175g (6oz) Self Raising Flour, Sifted
Pinch of Salt
175g (6oz) Butter, Softened (I use Stork Margarine)
175g (6oz) Caster Sugar
3 Eggs, at room temperature
1 tsp Vanilla Extract

Preheat the oven to 180oC/356oF/Gas Mark 4. Grease 2 x 8inch tins and line the bottom with baking parchment/ Greaseproof paper.

In a bowl, beat the butter until creamy. For best results use an electric hand whisk. Add the caster sugar and continue to beat until the mixture is very light and creamy. This will help to blend the eggs.


Add 1 egg and a tbsp of flour and beat thoroughly. The flour helps to prevent the mixture from curdling. Repeat for the remaining 2 eggs. Mix in the vanilla extract with the last egg.


Fold in the rest of the flour until all is combined. The mixture should drop off the spoon easily when tapped against the side of the bowl. If not, add 1-2 spoonfuls of hot water.


Divide the mixture evenly between the two cake tins and bake for 25 minutes, until golden brown and will spring back when lightly pressed with a finger. Leave them to cool in their tins for a couple of minutes and then turn them out onto a wire cooling rack.


For the Filling:
60g Butter, room temperature
125g Icing Sugar, Sifted (Plus extra for later)
Strawberry Jam

Beat the butter until creamy. Add a third of the icing sugar and beat well. Repeat for the remaining icing sugar. Spread butter icing on top of the bottom layer. Spread a layer of jam onto the bottom of the other cake and sandwich together. To finish, sprinkle with icign sugar.


Variations can include:
  • Using a different flavour jam
  • Filling the cake with sliced strawberries and whipped cream
  • Replacing the jam with lemon curd and adding lemon juice and zest into the cake mixture
  • Replacing 25g of flour with Cocoa powder and replacing 25g of the icing sugar with cocoa powder to create a chocolate cake with chocolate buttercream


Happy Baking! 
x

Please leave a comment below! 
Follow @NicckkNackk